AWS Lambda Functions Chaos Engineering - Extending Steadybit - Part 2 - Discovery
This article demonstrates how to implement a discovery for AWS Lambda. This is a prerequisite to inject failures into those.
Today I’m extending Steadybit with the ability to inject failures into AWS Lambda Functions. So I took the opportunity to demonstrate how to implement an extension in this blog post.
The goal: We inject failures into AWS Lambda Functions using Gunnar Grosch’s (@GunnarGrosch) failure-lambda npm package. But before we can inject failures into the functions we have to discover them.
How Discovery works
Discovery is what Steadybit calls the mechanism to identify targets in the environment. The Steadybit agent has many discoveries included, and extensions can contribute additional. To contribute, extensions need to provide an HTTP endpoint, which returns those targets. In our use case, that is the AWS Lambda functions. The Steadybit agent will periodically query this endpoint and send target updates to the platform. In addition, the extension will provide an endpoint providing metadata for the lambda target type and it’s attributes – so we’ll get nice labels and table views in the platform UI.
Quickstart using the extension scaffold
Best we start by copying the steadybit/extension-scaffold project as it is a great way to start writing an extension. It contains the base structure as well as helpful scripts to build and deploy the extension.
First, we run make eject and rename the “extrobot” package to “extlambda”. As we don’t want to write an event listener we remove the “extevents” package.
Discovering the Lambda Functions
So this is what we have to do: List all the Lambda functions using the AWS SDK, convert them into targets, and return them. For this, we implement the discovery endpoint handler in the getDiscoveredTargets (in extlambda/discovery.go)function:
result := make([]discovery_kit_api.Target, 0, 20)
var marker *string = nil
//Listing all lambda functions and using the marker for pagination
for {
    output, err := client.ListFunctions(ctx, &lambda.ListFunctionsInput{
        Marker: marker,
    })
    if err != nil {
        return result, err
    }

    for _, function := range output.Functions {
        result = append(result, toTarget(function))
    }

    if output.NextMarker == nil {
        break
    } else {
        marker = output.NextMarker
    }
}
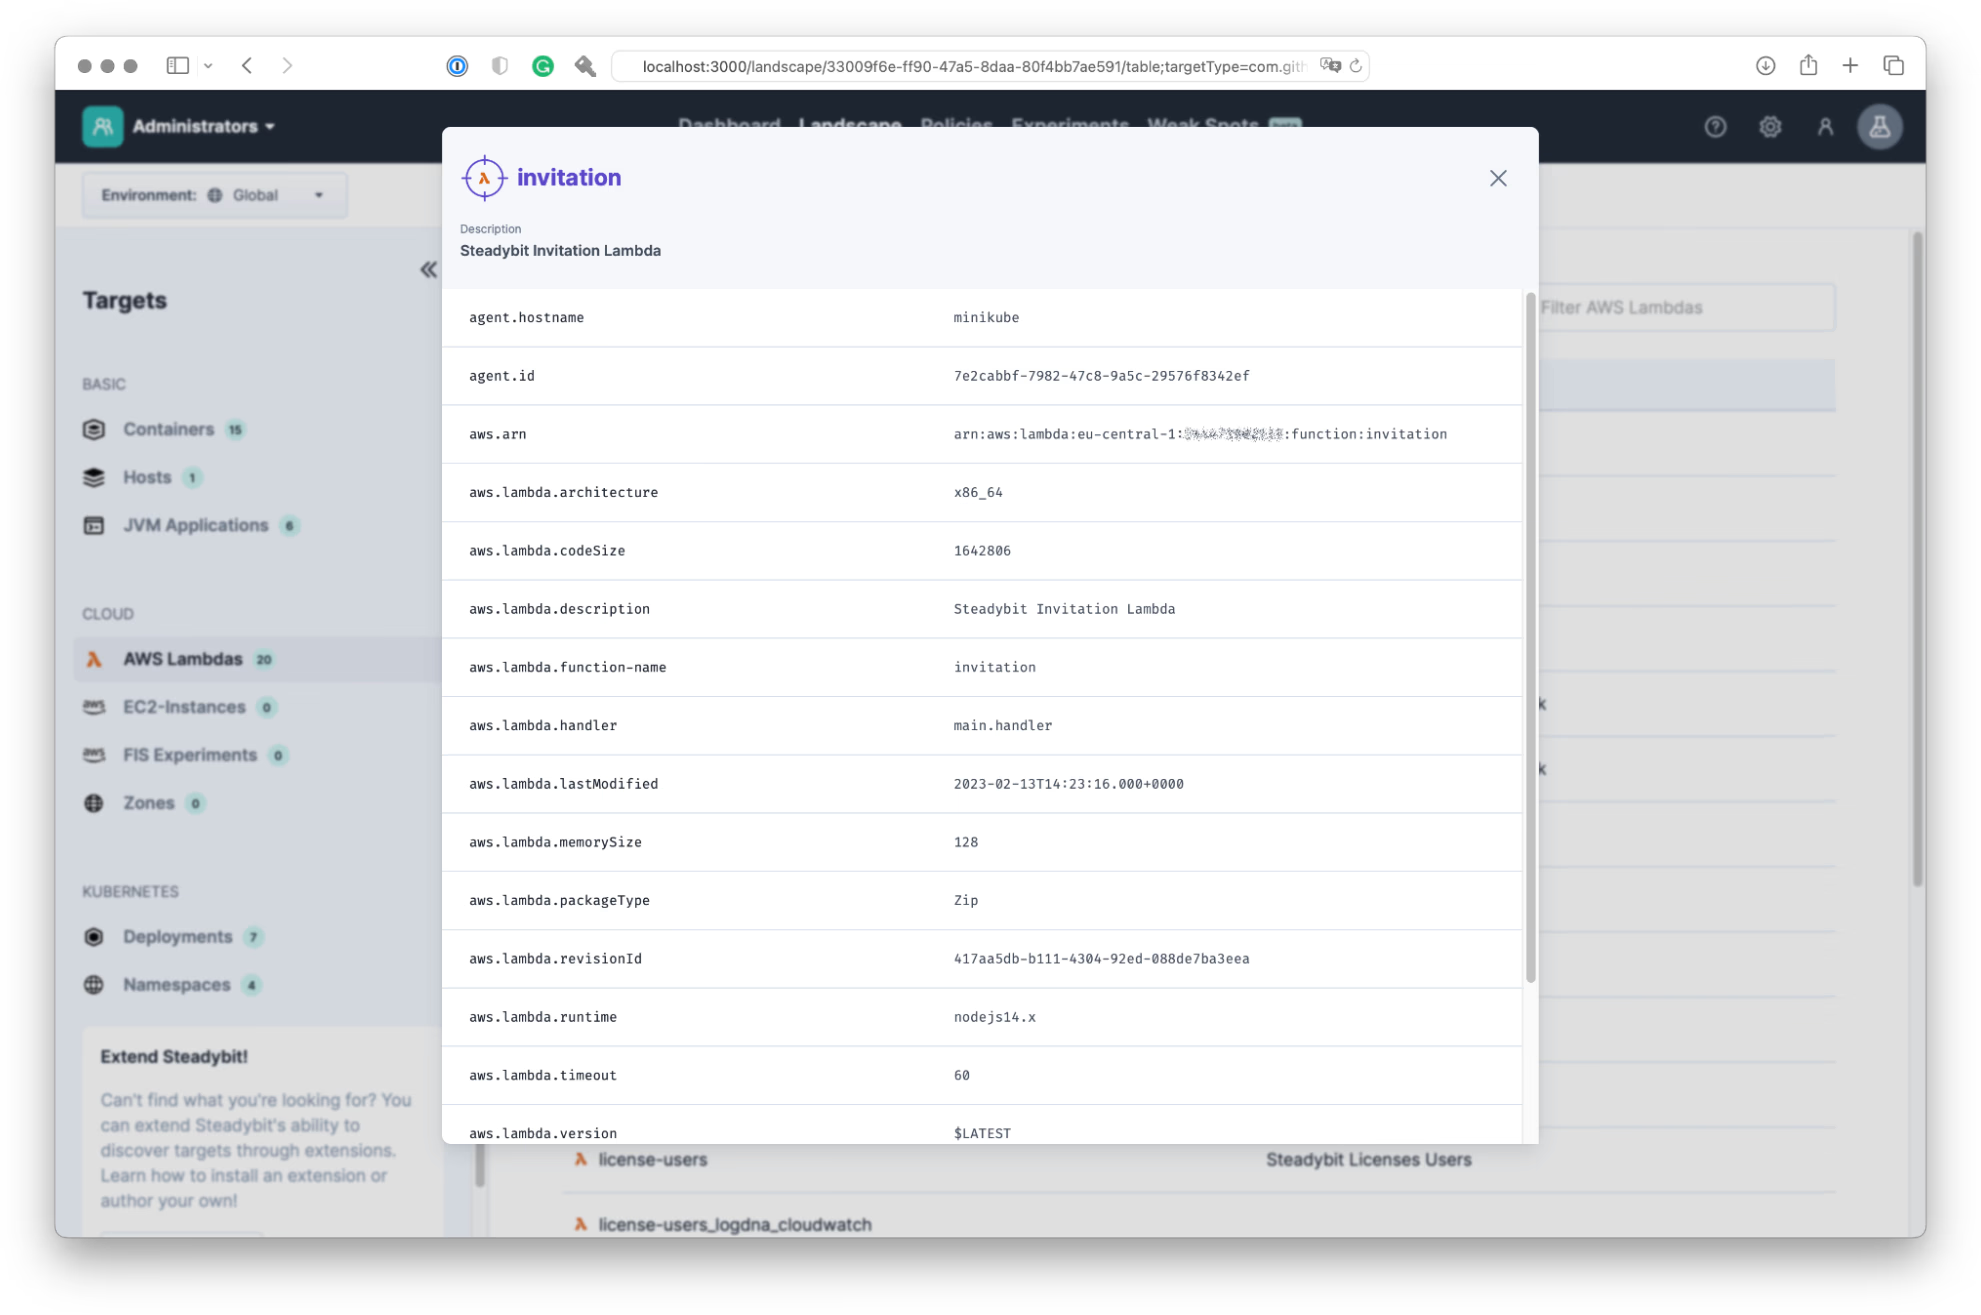
The toTarget method is a mapper function that converts the AWS representation of a Lambda function into Steadybit’s target model. We map all the properties relevant to the user to identify and select their targets, e.g., name, ARN, region, etc.
func toTarget(function types.FunctionConfiguration) discovery_kit_api.Target {
    arn := aws.ToString(function.FunctionArn)
    name := aws.ToString(function.FunctionName)

    attributes := make(map[string][]string)
    attributes["aws.arn"] = []string{arn}
    attributes["aws.lambda.function-name"] = []string{name}
    ...
    return discovery_kit_api.Target{
        Id: arn,
        Label: name,
        TargetType: targetID,
        Attributes: attributes,
    }
}
We also need attributes to do the actual failure injection: The failure-lambda library reads the failure injection configuration from the AWS Systems Manager (SSM) Parameter Store and injects the failure accordingly. The parameter is denoted by the environment variable FAILURE_INJECTION_PARAM. To control the failure-lambda library through our extension, the attack has to know which SSM parameter to set, so we also add this to our target attributes.
if function.Environment != nil && function.Environment.Variables != nil {
   attributes["aws.lambda.failure-injection-param"] = []string{function.Environment.Variables["FAILURE_INJECTION_PARAM"]}
}
Providing Descriptive Metadata for Users
The platform doesn’t know anything about our new target type – right now, it’s a bunch of key-value pairs. We added a metadata description to make more sense of the data we just provided. That way, we can render a nice logo and readable labels for the targets and attributes.
First, we set an id and an icon for the target type in extlambda/common.go. This id has to be unique for all registered target types, we encourage you to use the reverse DNS notation. For the icon, we use a data URL containing an SVG image.
const (
   targetID = "com.github.steadybit.aws.lambda"
   targetIcon = "data:image/svg+xml;base64,PD94bWwgdmV…shortened…."
   basePath = “/lambda”
)
And next, we complete the metadata provided by getTargetDescription.
We set a label and a category. The Landscape table will list the targets in this category using the table description we provide:
Label: discovery_kit_api.PluralLabel{One: "AWS Lambda", Other: "AWS Lambdas"},
Category: extutil.Ptr("cloud"),
Table: discovery_kit_api.Table{
    Columns: []discovery_kit_api.Column{
        {Attribute: "aws.lambda.function-name"},
        {Attribute: "aws.lambda.description"},
    },
    OrderBy: []discovery_kit_api.OrderBy{
        {
            Attribute: "aws.lambda.function-name",
            Direction: "ASC",
        },
    },
},
The last thing we need to do is write descriptions for the attributes in getAttributeDescriptions. These are labels that are used in the UI in various places.
Attribute: "aws.lambda.function-name",
   Label: discovery_kit_api.PluralLabel{
   One: "Function Name",
   Other: "Function Names",
},
...
Before running the extension, we must ensure the AWS SDK finds the proper credentials. So we create an Access Key in the IAM console and set it as AWS_REGION, AWS_ACCESS_KEY, and AWS_SECRET_ACCESS_KEY environment variables or use any other authentication scheme supported by the AWS go SDK. Running the extension on the local machine is done by executing “go run main.go”.
Now we do curl localhost:8080/lambda/discovery/discovered-targets, which should return a JSON response containing the discovered targets.
Build and Deploy
We are now ready to build and deploy the extension – the scaffold contains a Dockerfile and helm chart to do this. Keep in mind to also provide the necessary credentials when deploying. I deploy the extension into a Kubernetes cluster with a Steadybit agent. The helm chart adds the necessary labels so the agent’s autodiscovery will pick up the extension and report the targets to the platform. When everything is good, the new target will appear in the landscape:
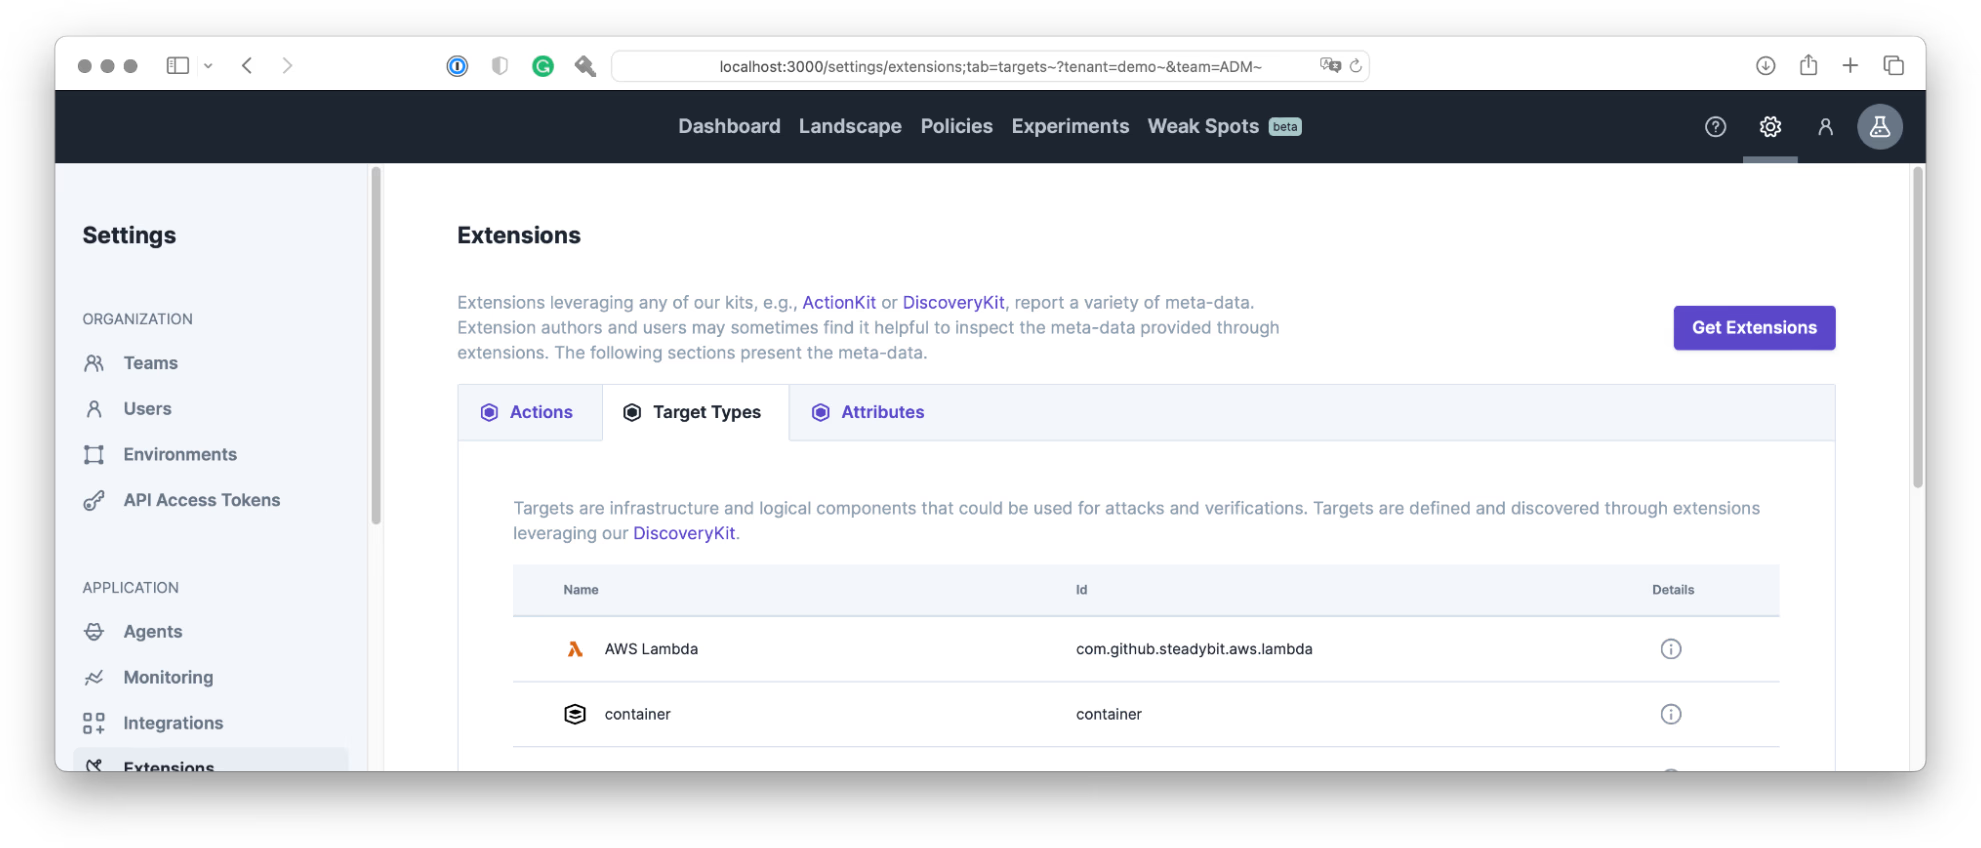
And the extension will also be listed in the settings:
Summary
First, we successfully deployed the extension, and is picked up by Steadybit. Second, we now have the Lambda functions visible, a prerequisite for attacking them.
With that in place, we head to part 3 and implement the attack.

Get started today
Full access to the Steadybit Chaos Engineering platform.
Available as SaaS and On-Premises!
or sign up with

Book a Demo
Let us guide you through a personalized demo to kick-start your Chaos Engineering efforts and build more reliable systems for your business!